
In this article
Verdict: No free AI image to video generator is truly unlimited, watermark-free, and sign-up-free all at once. The most reliably watermark-free option is CapCut’s web tool when you avoid Pro assets. For clips you can keep generating for free, Luma, Kling, Pika, and Hailuo refill credits daily or monthly but watermark the output. Runway, Adobe Firefly, and Canva are trial-only for video. Expect to create an account, and expect a watermark on most free output.
One still image can become five seconds of usable motion.
That is the real value of an AI image-to-video generator. Not replacing your whole editing workflow. Not making a full YouTube video from one prompt. Just turning static assets into clips you can use as b-roll, hooks, transitions, product shots, or Shorts visuals without filming anything.
What Is a Free AI Image to Video Generator?
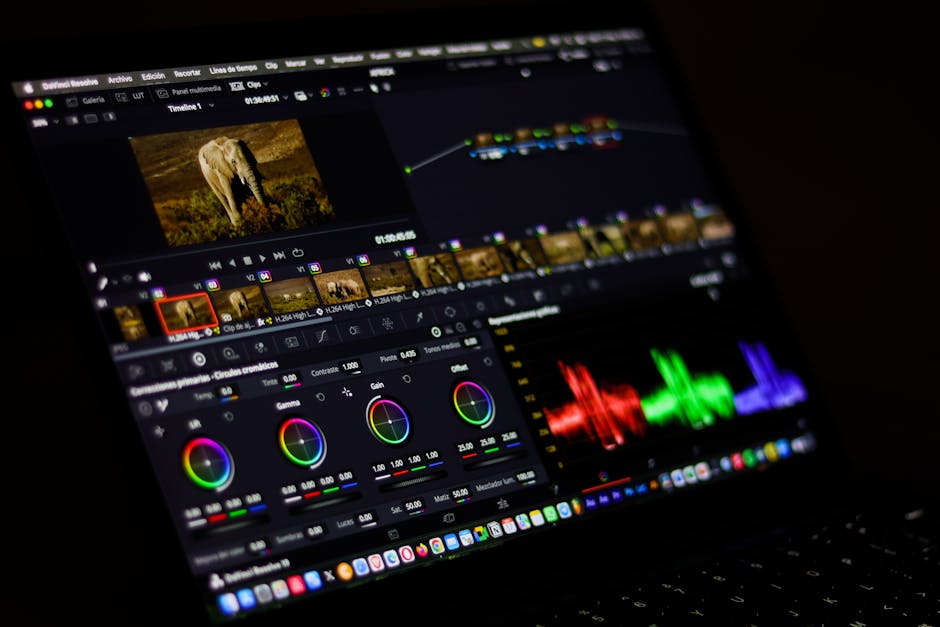
A free AI image-to-video generator turns a still image into a short video clip using generative AI. For faceless creators, the best use is not full video production. It is creating 3-10 second motion clips from thumbnails, product images, AI art, screenshots, or scene references, then editing those clips inside CapCut, Premiere, DaVinci Resolve, or Canva.
The keyword is “clip.”
Most free image-to-video tools produce short outputs. They can animate a landscape, add camera movement to a product shot, create a dramatic transition, or make a generated character move slightly. They do not replace scripting, pacing, retention editing, voiceover, or thumbnail strategy.
That matters because faceless creators often chase full automation too early. They look for one button that creates the whole video. The better workflow is smaller and more reliable:
- Generate or source a strong still image.
- Animate it into a short clip.
- Use the clip as b-roll inside a normal edit.
- Layer voiceover, captions, sound design, and retention cuts manually.
For the full production stack around these tools, start with the best AI tools for faceless content guide. This page only covers the image-to-video layer.
Here is the practical comparison, sorted by how usable the free tier is for ongoing faceless work.
| Tool | Free tier | Watermark on free output | Free limits | Sign-up |
|---|---|---|---|---|
| CapCut (web) | Free, credit-gated for heavy use | None if you use only your own uploads and free-library assets; Pro assets add one | No published free caps; basic AI editing plus limited generations | Marketed as no-sign-up for the standalone web tool; the fuller AI maker may need an account |
| Luma Dream Machine | Free daily credits | Yes | Draft quality (around 720p), daily credit cap, non-commercial | Required |
| Pika | Free, around 80 credits/month | Yes | 480p, Pika 2.5 model, roughly 6 short clips/month | Required |
| Kling | Free daily credits | Yes | About 5-second clips, capped below 1080p, slower queue | Required (the “no-sign-up” versions are third-party wrappers) |
| Hailuo (MiniMax) | Free daily bonus credits | Yes | Around 6-second clips, about 720p, slower queue, non-commercial | Required |
| Runway | Free 125 one-time credits | Yes | One-time only (about 25 seconds of Gen-4 Turbo image-to-video), then exhausted | Required |
| Adobe Firefly | Free credits (around 25/month) | Attaches AI content labeling; check the current plan for any visible mark | Video burns credits fast (roughly a second of video on the monthly free grant), so trial-only for video | Required (Adobe ID) |
| Canva | A few free AI video credits (lifetime, not monthly) | None if the design uses only free assets; Pro assets add one | Around 4 to 5 second clips, then Pro | Required |
Free tiers, watermarks, and limits verified June 2026 against each tool’s pricing and help pages plus independent reviews. AI video pricing changes monthly, so confirm the current limits on the tool’s own pricing page before you plan a workflow.
Which Free AI Image to Video Generator Has No Watermark?
CapCut’s web image-to-video tool is the most reliable watermark-free option, but only when your clip uses your own uploads and free-library assets. Add a Pro template, song, or stock clip and CapCut applies a watermark. Canva works the same way. Every dedicated AI video model on a free plan (Luma, Pika, Kling, Hailuo, Runway) watermarks free output, and removing it requires a paid plan.
So if a clean, watermark-free export matters and you are willing to keep everything in-house (your own images plus free assets), start in CapCut or Canva. If you want a specific AI model’s motion quality, budget for the paid tier or plan to crop or cover the watermark, which is risky and usually looks worse than just paying.
Is Any Free AI Image to Video Generator Truly Unlimited?
No. Truly unlimited free image-to-video does not exist in 2026. The closest are the daily-credit tools (Luma, Kling, and Hailuo), which refill a small credit grant every day, so you can make a few short clips per day indefinitely without paying. Pika gives a fixed monthly grant of around 80 credits. Runway (125 one-time credits), Adobe Firefly, and Canva run out quickly and then require payment.
Pages advertising “unlimited free AI video” are almost always third-party wrappers reselling another model’s credits behind their own interface. They can disappear, throttle, or change terms without notice, and the output rights are often unclear. Treat “unlimited free” as a marketing claim to verify, not a feature.
Which Free AI Image to Video Generator Needs No Sign-Up?
Effectively none of the real tools. Luma, Pika, Kling, Hailuo, Runway, Adobe Firefly, and Canva all require an account. CapCut markets its standalone web tool as no-sign-up, though the fuller AI video maker is credit-gated and may ask you to log in. The “no sign-up” sites you see for Kling or Hailuo are third-party wrappers, not the official tools.
Before you upload an image to any “no sign-up” site, check who operates it, whether your uploads are used for training or promotion, and what commercial rights you get. For anything you plan to publish or monetize, use the official tool and accept the sign-up.
1. CapCut Web: Best Free Starting Point for Faceless Creators
CapCut is the easiest first choice if you want a free AI image-to-video generator for faceless social clips. CapCut’s official image-to-video page says the web tool can turn uploaded images into animated videos, generate scripts, add AI voiceover, customize the result, and export/share from the same workflow.
CapCut wins for one reason: it sits next to the editor many faceless creators already use.
The official CapCut image-to-video AI tool describes a workflow where you upload photos, enter or generate a script, pick an AI voiceover, create the video, then customize captions, templates, music, voiceovers, avatars, and export settings. The official CapCut AI video page also describes desktop AI media workflows for image-to-video and text-to-video, including model selection and aspect ratio settings.
That makes CapCut useful for:
- Turning AI-generated thumbnails into motion hooks
- Creating vertical intro clips for TikTok and Shorts
- Animating product images for affiliate content
- Building photo-heavy slideshow videos
- Adding motion to static educational graphics
CapCut is not the strongest choice for cinematic control. It is the strongest choice for speed. If you already edit in CapCut, the clip does not need to move through three different tools before you can publish.
Faceless workflow
- Generate a still image in Midjourney, Firefly, Canva, or ChatGPT.
- Upload it into CapCut’s image-to-video workflow.
- Choose vertical 9:16 if the clip is for Shorts, TikTok, or Reels.
- Keep the prompt simple: camera push-in, slow pan, product reveal, light movement.
- Export the clip.
- Drop it into your main timeline and add captions, audio, and retention cuts.
For YouTube channels, CapCut works best as the editing layer inside a broader channel system. Pair this with the workflow in how to start a faceless YouTube channel if you are still building the production pipeline.
Best use case: beginner-friendly short-form clips and b-roll.
Weak spot: pricing, credits, and feature availability change often. CapCut’s official help pages say Pro pricing varies by region, device, and promotions, so do not build your economics around one fixed price until you check your own account.

2. Adobe Firefly: Best for Commercially Safer B-Roll
Adobe Firefly is the best free-to-start image-to-video option when commercial safety matters. Adobe says Firefly’s model is trained on licensed and public domain content, and its image-to-video feature can create MP4 clips for b-roll, cutaways, transitions, marketing content, and social media.
Firefly is not the fastest toy in the category. It is the most conservative choice for creators who care about rights, client work, or brand safety.
Adobe’s official Firefly image-to-video page says you can upload a photo, digital illustration, AI-generated image, or other static graphic, choose settings like resolution and aspect ratio, and export an MP4. Adobe also states that Firefly’s model is trained on licensed content and public domain content where copyright has expired.
That is useful for faceless creators building:
- Product demo b-roll
- Brand-safe educational clips
- Client deliverables
- Course visuals
- Website and ad cutaways
The practical advantage is trust. If your channel is just testing Shorts, CapCut may be enough. If you are creating content for a client, an affiliate brand, or a digital product funnel, Firefly’s positioning is easier to defend.
Faceless workflow
- Create a still visual that already looks like the final frame.
- Upload it into Firefly’s image-to-video tool.
- Use camera movement instead of wild object motion.
- Export the short MP4.
- Finish the edit in Premiere, CapCut, DaVinci Resolve, or Canva.
Use Firefly when you need polish, not chaos.
Best use case: b-roll and transitions where licensing anxiety is a real concern.
Weak spot: free access is limited. Adobe says Firefly can be started for free, but more usage and higher limits require credits or paid plans. Check your account before planning a high-volume workflow.
3. Canva AI Video: Best for Non-Editors Who Already Use Canva
Canva is best when the image-to-video task is part of a larger design workflow: templates, captions, graphics, avatars, brand colors, and social export. Canva’s official AI video page focuses on text-to-video, synchronized audio, avatars, effects, templates, and editing tools inside Canva.
Canva is not a specialist image-to-video lab. It is a publishing workspace.
That distinction matters. If your only goal is the highest-quality motion from one still image, Canva is usually not where a power user starts. If your goal is to create a simple faceless Reel, add brand fonts, place captions, and export without learning a timeline editor, Canva is strong.
The official Canva AI video generator page describes text prompt video generation, synchronized audio, talking-head avatar options, templates, graphics, animations, filters, and editing tools. Canva’s AI Product Terms also put responsibility on users for inputs and outputs and say Canva does not verify AI output accuracy, completeness, or reliability.
That makes Canva a good fit for:
- Pinterest-style video pins
- Instagram quote pages
- Simple TikTok explainers
- Course promos
- Lead magnet videos
- Faceless brand assets
For examples of how faceless pages use repeatable social formats, read the faceless TikTok accounts breakdown.
Faceless workflow
- Start with a Canva template in the target format.
- Add your still image or generated visual.
- Use Canva AI video or animation tools to add motion.
- Add captions, icons, and branded overlays.
- Export directly for the platform.
Best use case: quick branded social assets.
Weak spot: less control over cinematic image-to-video motion than dedicated AI video tools.
4. Luma: Best for Cinematic Experiments
Luma is best when you want cinematic experimentation rather than a simple slideshow. Luma’s current site positions the product around creative agents, video, image, audio, and text workflows, with trial credits and paid individual plans for higher-volume use.
Luma is more creative lab than beginner utility.
The current Luma product page positions Luma around creative agents that work across video, image, audio, and text. Luma’s pricing page currently lists free trial credits, Luma and third-party image/video models, paid individual plans, and commercial use on paid plans.
For faceless creators, Luma makes sense when the visual style itself is the hook:
- AI history shorts
- Cinematic finance metaphors
- Futuristic tech explainers
- Trailer-style intros
- Story-driven b-roll
- Surreal transitions
It is not the tool I would use for every scene in a 10-minute YouTube video. The economics and review time get messy. Use it to generate standout moments, then surround those clips with cheaper footage, screen recordings, captions, and diagrams.
Faceless workflow
- Make a strong hero image first.
- Animate it in Luma with a specific camera direction.
- Generate 2-4 variations.
- Keep the best 3-5 seconds.
- Add it as a visual hook or scene transition.
Best use case: cinematic hooks and experimental b-roll.
Weak spot: not the cheapest way to produce repeatable daily content.
5. Pika: Best for Social-First Stylized Clips
Pika is useful for stylized social video experiments, especially where the creative effect matters more than strict realism. Its current public site emphasizes sign-in access and Pikaformance-style image performance features, so exact free limits and model availability should be checked in the app.
Pika has always been strongest when the output is meant to feel internet-native.
The current Pika website points users into sign-in and highlights image performance features that can sync expressions to sound. That makes it interesting for meme formats, stylized shorts, animated images, and social-first creative tests.
For faceless creators, Pika is not a full editing platform. Treat it as a clip generator:
- Animate a character image
- Create a surreal short hook
- Make a visual gag
- Add motion to social graphics
- Test alternative intros
Pika is especially relevant for short-form channels where the opening visual must stop the scroll. If your content lives mostly on TikTok, Reels, or Shorts, test it. If your main work is long-form YouTube search content, use it more selectively.
Best use case: stylized clips and short-form hooks.
Weak spot: app access, limits, and features change often. Verify the current workflow before promising a client or planning a batch.
6. Runway: Best When You Need More Creative Control
Runway is best for creators who want higher-end AI video control and are willing to manage credits. Runway’s public product pages position it around text, image, video, and audio references for creating multi-shot videos, which fits advanced b-roll and concept work better than simple beginner edits.
Runway is where the category started to feel serious for creators.
Its public Seedance on Runway page describes using text prompts plus image, video, or audio references to create multi-shot videos. That reference-based workflow matters because faceless channels often need consistency: same product, same environment, same visual tone.
Use Runway when the clip needs direction:
- Specific camera motion
- More controlled scene style
- Product visuals
- Explainer b-roll
- Concept sequences
- Higher-end ad creative
Do not use Runway as a dumping ground for weak prompts. The better the input image and direction, the better the output.
Faceless workflow
- Start with a high-quality still image.
- Write a short prompt with camera direction and motion.
- Generate a few candidates.
- Select only the cleanest seconds.
- Finish pacing and captions in your editor.
Best use case: advanced b-roll and creative direction.
Weak spot: free/trial usage is limited and credits go quickly if you iterate heavily.
7. Aggregator Tools: Best for Testing Models, Not Building the Business
Aggregator tools can be useful for quickly testing multiple video models, but they are the riskiest option for a serious faceless workflow. Use them for experimentation, then verify licensing, privacy, export quality, watermarks, and commercial rights before publishing at scale.
There are many “free AI image to video generator” pages that aggregate models like Kling, Runway, Luma, Veo, Seedance, Pika, and others behind one interface.
That can be useful. It can also be a mess.
Aggregator tools are fine for:
- Testing which model handles your image style
- Creating non-client experiments
- Comparing motion styles
- Getting quick inspiration
They are weaker for:
- Client deliverables
- Brand channels
- Affiliate campaigns
- Anything involving private images
- Work where commercial rights matter
Before you use an aggregator tool in a serious workflow, answer five questions:
- Who operates the site?
- What are the output rights?
- Are uploads used for training or promotion?
- Are there watermarks?
- Can you export in the format and resolution you need?
If the answer is unclear, use CapCut, Firefly, Canva, Luma, Pika, or Runway directly.
Which Free AI Image to Video Generator Should You Choose?
Choose CapCut if you want the easiest free faceless workflow. Choose Adobe Firefly if commercial safety matters. Choose Canva if you already design everything there. Choose Luma, Pika, or Runway when you need stronger creative motion and can tolerate credits, sign-in limits, or more manual review.
Here is the decision table.
| Creator Situation | Best Tool | Why |
|---|---|---|
| Beginner making Shorts | CapCut | Fast, familiar, easy to edit after generation |
| Client or brand work | Adobe Firefly | Stronger commercial-safety positioning |
| Canva-first creator | Canva | Templates, captions, brand kit, export in one place |
| Cinematic faceless channel | Luma | Better for dramatic hooks and trailers |
| Meme/social-first creator | Pika | Stronger for stylized effects and image performance |
| Advanced creative operator | Runway | More control and reference-based workflows |
| Model testing only | Aggregator tools | Useful for experiments, weak for long-term reliability |
The mistake is choosing by hype. Choose by workflow fit.
If you publish one short per week, Canva or CapCut is enough. If you publish daily faceless Shorts, you need speed and repeatability. If you produce high-ticket client content, you need rights clarity and review standards. If you run a cinematic AI channel, you need stronger model control and a bigger credit budget.
Want the production system behind these clips? The YouTube Automation Playbook has 20 fill-in-the-blank scripts, 50 thumbnail concepts, and 5 production SOPs - from zero to first upload. Get it for $5.
How to Use AI Image-to-Video Clips Without Making Low-Quality AI Slop
The safest way to use AI image-to-video clips is to treat them as supporting b-roll, not the whole video. Write the script first, use generated clips only where motion improves comprehension or retention, and disclose realistic synthetic content when platform rules require it.
AI video is powerful enough to make bad content faster.
That is the trap.
A clip of a robot walking through a neon city does not fix a weak script. A slow camera pan over an AI-generated office does not create viewer trust. A fake news-style scene can create disclosure and credibility issues if it looks realistic.
Use this production rule:
One generated clip must do one job.
Examples:
- Hook: show the outcome in the first three seconds.
- Transition: move between sections.
- Illustration: visualize a concept that is hard to film.
- Product: animate a still product image.
- Pattern break: reset attention after 20-40 seconds.
Do not fill every gap with generated footage. Mix it with screenshots, charts, stock b-roll, subtitles, and simple motion graphics.
For YouTube, read the official YouTube Help page on altered or synthetic content. The short version: disclose realistic altered or synthetic content when viewers could mistake it for a real person, place, scene, or event. Abstract AI visuals, clearly animated scenes, and production assistance are different from realistic deception, but you should check the current rule before publishing sensitive content.
A Simple Faceless Workflow for Image-to-Video
The best beginner workflow is: script first, image second, motion third, edit last. That order keeps the AI clip serving the video instead of the video becoming a random collection of generated clips.
Use this for your next video.
Step 1: Write the segment
Write the exact voiceover line before generating the clip.
Bad prompt-first workflow:
“Create a cool AI city video.”
Better script-first workflow:
“Most beginners do not fail because they picked the wrong editor. They fail because every video uses a different workflow.”
Now the visual brief is obvious: a chaotic editing timeline turning into an organized production board.
Step 2: Create the still image
Use whichever image tool you already trust. The still image should carry the composition. The video generator should add motion, not rescue a weak frame.
Step 3: Animate only what needs motion
Give the video tool a narrow instruction:
- “Slow push-in toward the laptop screen.”
- “Camera pans left across a production board.”
- “Subtle parallax, no new objects.”
- “Product rotates slowly on a clean background.”
Avoid vague prompts like “make it epic.” Vague prompts create random motion.
Step 4: Trim aggressively
Most generated clips have one good section. Use that section.
If a clip is eight seconds long and only three seconds are clean, keep the three seconds. Viewers never see the discarded part.
Step 5: Add captions and sound manually
Captions, pacing, sound effects, and music still decide whether the clip feels professional. The image-to-video tool creates raw material. The edit creates the video.
For long-form channel examples, study the production patterns in top AI faceless YouTube channels. The strong channels use tools as inputs, not as the whole strategy.

Free vs. Paid: When Should You Upgrade?
Stay free while you are testing formats. Upgrade only when generated clips become part of a repeatable publishing workflow, you need higher limits, you need commercial rights clarity, or free watermarks/queues/credits slow down production.
Free is enough for:
- Testing a niche
- Making the first 5-10 Shorts
- Learning prompt patterns
- Creating occasional b-roll
- Comparing tools
Paid becomes worth it when:
- You publish daily
- You need consistent export quality
- You make client content
- You need commercial-use confidence
- You lose more time waiting than the subscription costs
- You need team/project organization
Do not upgrade because a tool looks impressive. Upgrade because it removes a bottleneck you can name.
Example:
If your bottleneck is “I cannot produce enough motion b-roll for my AI history Shorts,” a paid video tool might help.
If your bottleneck is “I have not picked a niche,” a paid video tool will not help.
Start with the channel strategy first. Then buy tools.
Frequently Asked Questions
What is the best free AI image to video generator?
For most faceless creators, CapCut is the best free starting point because the generated clip can move directly into a familiar editing workflow. Adobe Firefly is the better choice when commercial safety matters. Canva is best if you already create your graphics and social assets there.
Can I make a full faceless YouTube video with image to video AI?
Technically, yes. Practically, it usually looks repetitive. Image to video AI works best for short clips, b-roll, intros, transitions, and pattern breaks. A full faceless YouTube video still needs scripting, voiceover, pacing, captions, audio, and editorial judgment.
Are free AI image to video generators safe for commercial use?
It depends on the tool and plan. Adobe explicitly positions Firefly around commercially safer training data. Other tools may allow commercial use only on certain plans or under specific terms. Check the official terms before using generated clips in ads, client work, or monetized products.
Do I need to disclose AI image to video clips on YouTube?
YouTube requires disclosure when realistic altered or synthetic content could mislead viewers into thinking a real person, place, scene, or event happened. Clearly animated or obviously unrealistic visuals are different, but rules change. Check YouTube’s current altered or synthetic content guidance before publishing realistic AI scenes.
What aspect ratio should I use for AI image to video clips?
Use 9:16 for TikTok, Reels, and YouTube Shorts; 16:9 for long-form YouTube; and 1:1 or 4:5 for some feed posts. Decide the platform before generation. Cropping a generated clip after the fact can ruin framing and motion.
Keep Reading
- Best AI Tools for Faceless Content Creation - the full production stack around image-to-video clips
- CapCut AI Video Generator Review - when CapCut is enough and when to upgrade
- How to Start a Faceless YouTube Channel - the channel workflow these clips fit inside
- Faceless TikTok Accounts - social formats where image-to-video clips can work fast
Tool-hopping between CapCut, ElevenLabs, vidIQ, Midjourney? The free Faceless Tool Stack Plan compares $0, $30, and $100 monthly tiers across the six production jobs. Pick one tier, stop the subscription rot.
What to Do Next
Don't pay for a stack you don't need yet. Start with the cheapest workable setup.
Get the Tool Stack Plan
3 tiers ($0, $30, $100), 12 tools, upgrade triggers per tier. Decide once, stop hopping. Free PDF.
Free. No spam. Unsubscribe anytime.
Browse the Tools Hub
Free YouTube tools: name generator, title generator, money calculator, thumbnail preview. No signup.
Open Tools HubFaceless Launch System - $5
20 scripts, 50 thumbnails, 5 production SOPs. The build that replaces a $30/mo tool subscription.
Get the System - $5