In this article
Every faceless channel runs on a repeatable production system.
No camera. No lighting rig. No on-screen personality required. What you need instead is a workflow — script to voiceover to footage to edit — that you can run in under three hours per video. This guide gives you that workflow, step by step, using tools that cost less than $30 per month combined.
What You’ll Need
Before opening any tool, confirm you have these in place:
- A niche — chosen and locked, not still deciding
- A YouTube account with a channel created
- An AI voiceover tool (ElevenLabs, Murf, or PlayHT)
- A video editor (CapCut, DaVinci Resolve, or iMovie)
- Access to stock footage (Pexels free tier covers most niches to start)
- Canva (free plan handles thumbnail design)
- A script framework or AI writing tool (ChatGPT or Claude)
Total cost to start: free to $20–30 per month, depending on which tools you choose.
Step 1: Lock In Your Niche Before You Touch Any Tool
No production workflow saves you from the wrong niche.
Every decision downstream — your script format, your voiceover tone, your thumbnail visual language — flows from knowing exactly who watches your channel and why. Picking the niche first is not a step you can defer.
The best faceless niches share three traits: the content does not require on-screen demonstrations, the niche has real advertiser demand (CPM consistently above $5), and the topic has searchable volume on YouTube.
High-CPM niches that work well for faceless channels:
| Niche | Estimated CPM Range | Content Format That Works |
|---|---|---|
| Personal finance and investing | $15–40 | Narrated explainer + stock footage |
| AI and software tools | $8–25 | Screen recordings + narration |
| Business and entrepreneurship | $10–30 | Listicle format + stock footage |
| Health and wellness | $6–15 | Animated explainer + B-roll |
| History and true crime | $4–12 | Documentary-style narration |
CPM ranges reflect creator community self-reporting from r/NewTubers and r/youtubemakers. Actual CPM varies by audience geography, video length, and advertiser demand at the time of publication.
If you are still choosing, the faceless YouTube channel ideas breakdown ranked by revenue potential and the best faceless YouTube niches by CPM and competition score give you data-backed options with proof of concept.
Step 2: Set Up Your Channel Identity
Channel setup takes one hour. Do it right once and move on.
Channel name. Niche-based names (“Finance Decoded,” “HistoryVault”) and persona-based names both work. Avoid your real name if full anonymity matters to you. Use the free YouTube channel name generator to get 20 options in under a minute.
Channel art. Design a banner and profile icon in Canva — no face needed. Your banner should communicate your niche in under two seconds: bold text, single visual theme, consistent color palette. Aim for 2560×1440px for the banner (YouTube renders the safe zone at 1546×423px).
Channel description. Two sentences: what you cover and who it is for. Include your primary keyword once in the first sentence. Skip personal bios — the channel identity is the niche, not you.
About section links. Add a link to your lead magnet or email signup on day one. Every visitor who checks your About section is warm traffic you can capture.
For the complete technical setup — category selection, keyword-optimized tags, and monetization prerequisites — see how to start a faceless YouTube channel.
Step 3: Write Your Video Script
A script is the most consequential production decision you make.
Everything else — voiceover delivery, footage selection, editing pace — follows from the script. A weak script cannot be rescued by clean visuals or a natural AI voice. Write the script first.
The four-part script structure:
- Hook (0–30 seconds). State the payoff before the setup. “In this video you’ll get the exact workflow I use to script, record, and edit a faceless video in under three hours.” Do not tease or stall. Deliver the promise immediately.
- Context (30 seconds–2 minutes). One pain point, stated plainly. No extended backstory or agenda-setting. Get to the content.
- Meat (2 minutes–end). The actual information organized as numbered steps or a clear sequence. Each segment should stand alone as a useful, self-contained chunk.
- CTA (final 30 seconds). One action: subscribe, watch the next video, or download a resource. One CTA, not three.
AI-assisted scripting workflow:
Open ChatGPT or Claude and use this prompt structure: “Write a YouTube script on [specific topic]. Format: hook → brief context → [N] numbered steps → one-sentence CTA. Voice: direct and conversational, no hype, no filler. Target length: 900–1,100 words.”
Edit the output: replace generic examples with specific ones, cut vague claims, add at least one concrete data point or named example per major section.
Target script length: 700–1,200 words for a 5–10 minute video. At a natural speaking pace of 130–150 words per minute, a 1,000-word script produces a 7–8 minute video — the range that balances watch time, monetization eligibility, and viewer completion rate.
Step 4: Record Your Voiceover
This is where most faceless channels lose viewers.
A robotic AI voice destroys retention. A natural-sounding voice — even if fully AI-generated — keeps people watching. The difference is tool selection and voice configuration, not recording budget.
AI voiceover tools by use case:
| Tool | Price | Best For |
|---|---|---|
| ElevenLabs | $5–22/month | Most natural AI voices, best for long-form narration |
| Murf | $19–26/month | Business and professional tone |
| PlayHT | $24/month | Multiple voice styles, strong for listicle content |
| CapCut built-in | Free | Beginner-friendly, acceptable for short-form |
For most channels, ElevenLabs at the Starter tier ($5/month) provides enough monthly character quota for three to four videos per week.
Recording workflow:
- Paste your finalized script into the voiceover tool
- Select a voice that matches your niche tone — formal for finance, relaxed for entertainment
- Add natural pauses using em-dashes or line breaks where the narration should breathe
- Export as MP3 or WAV at 44.1kHz, 192kbps or higher
If you prefer your own voice without appearing on camera, record audio-only with any USB microphone and use Audacity (free) or Adobe Audition to remove room noise and normalize the track.
Want the production system behind these channels? The Complete Channel Launch Pack gives you 10 channel blueprints, setup prompts, thumbnail concepts, and a 30-day starter plan so you can start from a picked channel instead of a blank page. Get it for $9 →
Step 5: Source Your B-Roll Footage
B-roll is the visual layer that runs while your voiceover plays. Most faceless channels combine stock footage with screen recordings.
Free footage sources:
- Pexels — largest free stock video library, no attribution required, high-quality clips across most topics
- Pixabay — secondary option, strong for nature and abstract visuals
- YouTube Studio audio library — free background music and sound effects
Paid sources (for when free libraries fall short):
- Storyblocks — subscription model at $15–30/month, unlimited downloads, good for cinematic niches
- Artgrid — high-quality cinematic footage, best for documentary-style channels
Sourcing workflow:
- Read through your script and mark every section that needs a visual change — typically every 3–8 seconds
- Search for clips by mood and context, not just literal subject (“business success,” “technology abstract,” “financial growth”)
- Download 2–3 clip options per section to give yourself editing choices
- Organize clips in labeled folders matching your script sections
A typical 7–8 minute video uses 15–25 separate footage clips.
Step 6: Edit Your Video
The editing step is where your production workflow either scales or breaks down.
Tool recommendation by experience level:
- Beginner: CapCut (free) — drag-and-drop interface, auto-generates captions from voiceover, built-in transitions and AI effects. Reviewed in detail: CapCut AI video generator for faceless creators.
- Intermediate: DaVinci Resolve (free) — professional color grading, full multi-track timeline, steeper learning curve
- Advanced: Adobe Premiere Pro ($23/month) — industry standard, maximum flexibility and plugin support
Editing sequence:
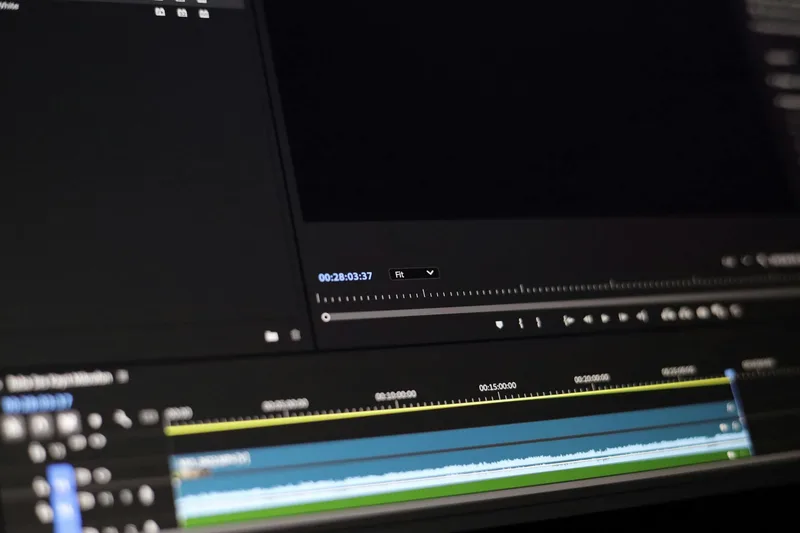
- Import your voiceover track and lay it on the timeline first — the audio drives the edit
- Place footage clips above the voiceover, synced to content topic changes
- Add background music at 10–15% of the voiceover volume — never let it compete with narration
- Add captions — CapCut auto-generates them; otherwise use Descript or Rev.com
- Add title cards between major sections
- Color grade: slightly warm for lifestyle niches, cooler and more desaturated for tech and finance
- Export at 1080p minimum, 30fps. 4K if your footage supports it.
Target editing pace: one cut every 3–5 seconds in information-dense sections. Slower sections can breathe. Constant fast cutting feels anxious — match the pace to the content mood.
Time budget per video with a working workflow: script (45–60 minutes), voiceover (20–30 minutes), footage sourcing (30–45 minutes), editing (60–90 minutes). Under four hours total.
For channels ready to remove themselves from the editing step entirely, faceless YouTube automation tools and workflows covers how to outsource or systematize each production phase.
Step 7: Design Your Thumbnail
Your thumbnail determines click-through rate. CTR directly affects how aggressively YouTube distributes your video — the algorithm rewards videos that earn the click.
Faceless thumbnails rely on text, imagery, and contrast — not faces. A Backlinko study on YouTube ranking factors found that text-overlay thumbnails perform comparably to face thumbnails across most niches. In finance and history content specifically, text-heavy thumbnails frequently outperform face-forward ones due to the perceived authority signal.
Thumbnail formula for faceless channels:
- Bold headline text — 3–6 words, high contrast, readable at thumbnail size (150×84px)
- One visual anchor — stock image, icon, infographic, or branded illustration
- Consistent color palette matching your channel identity
- No face required — use royalty-free stock imagery, branded graphics, or abstract visuals
Tool: Canva free plan handles everything. Use the YouTube thumbnail template (1280×720px) and adapt your channel color palette into a reusable template. The consistency of a recognizable template builds channel recognition even without a face.

Step 8: Upload and Optimize for YouTube Search
Publishing is not the final step. Optimization is.
YouTube is the world’s second-largest search engine. Every field in the upload interface is a ranking signal — and most creators fill them in poorly.
Title. Include your primary keyword near the front. Keep it under 70 characters. Write for humans first: “How to Make a Faceless YouTube Channel in 2026 (No Camera Needed)” outperforms a keyword-stuffed title. Use the free YouTube title generator to test variants before publishing.
Description. The first 150 characters appear in search results — treat them as a meta description. Write 3–5 paragraphs covering your main points with your primary keyword appearing once in the first paragraph. Include timestamps and 3–5 links to related videos on your channel.
Tags. 5–10 tags. Start with your exact primary keyword, then add variations and broader terms. Tags are a supporting signal — prioritize title and description.
Chapters. Add timestamps for every major section. Chapters help YouTube index your content for specific queries within the video and improve viewer experience.
Thumbnail. Always upload your custom thumbnail from Step 7. Never use YouTube’s auto-generated thumbnail.
First 48 hours. Pin a comment on your video with a follow-up question or resource. Reply to every comment in the first 48 hours. Early engagement signals tell the algorithm the video earns continued distribution.
Common Mistakes That Kill Faceless Channels
1. Launching without a committed niche. Switching niches after 15–20 videos wastes your upload momentum. YouTube’s recommendation algorithm builds topical associations around your channel over time. Mixed niches produce weak associations and poor recommendation performance. Decide once, post consistently for at least 30 videos, then evaluate.
2. Using low-quality AI voices without testing. Free and entry-level AI voices often have unnatural rhythm and mispronounce technical terms. Before committing to a voice, generate a 200-word test clip and listen on headphones. Would you watch a 10-minute video narrated in this voice? If the answer is hesitant, upgrade the tool or choose a different voice model.
3. Skipping thumbnail design entirely. Some creators skip thumbnails because “the channel doesn’t have a visual identity yet.” This is backwards. The thumbnail is how viewers choose your video in search results. A default YouTube auto-screenshot thumbnail depresses CTR across every video it touches — including future videos that might otherwise perform well.
4. Posting in bursts then going silent. YouTube rewards channels with consistent posting schedules. Once per week, every week, significantly outperforms three videos in a burst followed by a six-week gap. Momentum stalls and restarts each time you go dark. Build a sustainable pace first — volume comes after the workflow is locked.
5. Ignoring YouTube Studio analytics after upload. Your first 10–15 videos are a research exercise. Check click-through rate (CTR), average view duration, and audience retention graphs for every video. If CTR is under 2%, the thumbnail or title is the problem. If viewers drop off at a specific point, something in the script or edit lost them. Fix those signals before posting the next video.
Frequently Asked Questions
How long does it take to make a faceless YouTube video?
With a working production workflow, a typical 7–10 minute faceless video takes 3–4 hours from script to upload. The breakdown is roughly: script writing (45–60 minutes), AI voiceover generation (20–30 minutes), footage sourcing (30–45 minutes), editing (60–90 minutes), and thumbnail plus upload (30 minutes). Your first few videos take longer while you build and refine the system.
What is the best AI voice for a faceless YouTube channel?
ElevenLabs produces the most natural-sounding AI voices for long-form YouTube narration at the time of writing. Its Starter plan ($5/month) covers approximately 30,000 characters per month — sufficient for three to four 7–10 minute videos weekly. For a free starting point, CapCut’s built-in text-to-speech is functional for short-form content but sounds noticeably synthetic on longer narration.
Do you need equipment to make a faceless YouTube channel?
No dedicated equipment is required. A laptop with internet access covers the full production stack. Stock footage replaces a camera. AI tools replace a microphone for voiceover. If you prefer your own voice, a $30–50 USB microphone reduces room noise compared to a built-in laptop mic — that is the only hardware upgrade worth making in the first few months.
Can a faceless YouTube channel qualify for YouTube monetization?
Yes. The YouTube Partner Program requirements are format-neutral: 1,000 subscribers and 4,000 watch hours in the past 12 months, or 1,000 subscribers and 10 million Shorts views in 90 days. Faceless channels that post consistently in a high-CPM niche typically reach these thresholds within 6–12 months from the first video.
What is the cheapest way to start a faceless YouTube channel?
The free stack: CapCut for editing, Pexels for stock footage, Canva free plan for thumbnails, and ChatGPT or Claude free tier for scripting. The one area where free tools limit quality is voiceover — free AI voices have noticeably robotic delivery that affects viewer retention. If one paid tool is in the budget, ElevenLabs at $5/month is the highest-leverage upgrade for a new faceless channel.
Keep Reading
What to Do Next
Still deciding whether faceless YouTube fits you? Pick the next step that gives you direction, not a sales pitch.
Free spreadsheet
Compare 75 faceless niches side by side
Sort all 75 by CPM range, competition, and production difficulty. Filter to what fits you and pick one.
Free. No spam. Unsubscribe anytime.
Take the 2-min Quiz
Answer 10 questions, get matched to a channel model that fits your time, budget, and tone.
Start the Quiz